React semantic UI tutorial for beginners
React semantic UI tutorial for beginners
Semantic UI is a framework to develop responsive applications. In this tutorial, we are going to see how to build a react application with react semantic UI library.
Install and Setup
we will be using react semantic ui library for our application which a wrapper of semantic ui to use in react applications. we will create our react application using create-react-app
npx creat-react-app react-semantic-recipeLet’s install semantic ui in our application
npm install semantic-ui-react semantic-ui-cssOnce, you install the package. import the css of semantic ui in your index.js
import "semantic-ui-css/semantic.min.css";Now, you can use semantic ui in your react components.
Building semantic ui react application
To learn how to build a react application with semantic ui. we will build a recipe application using MealDB API
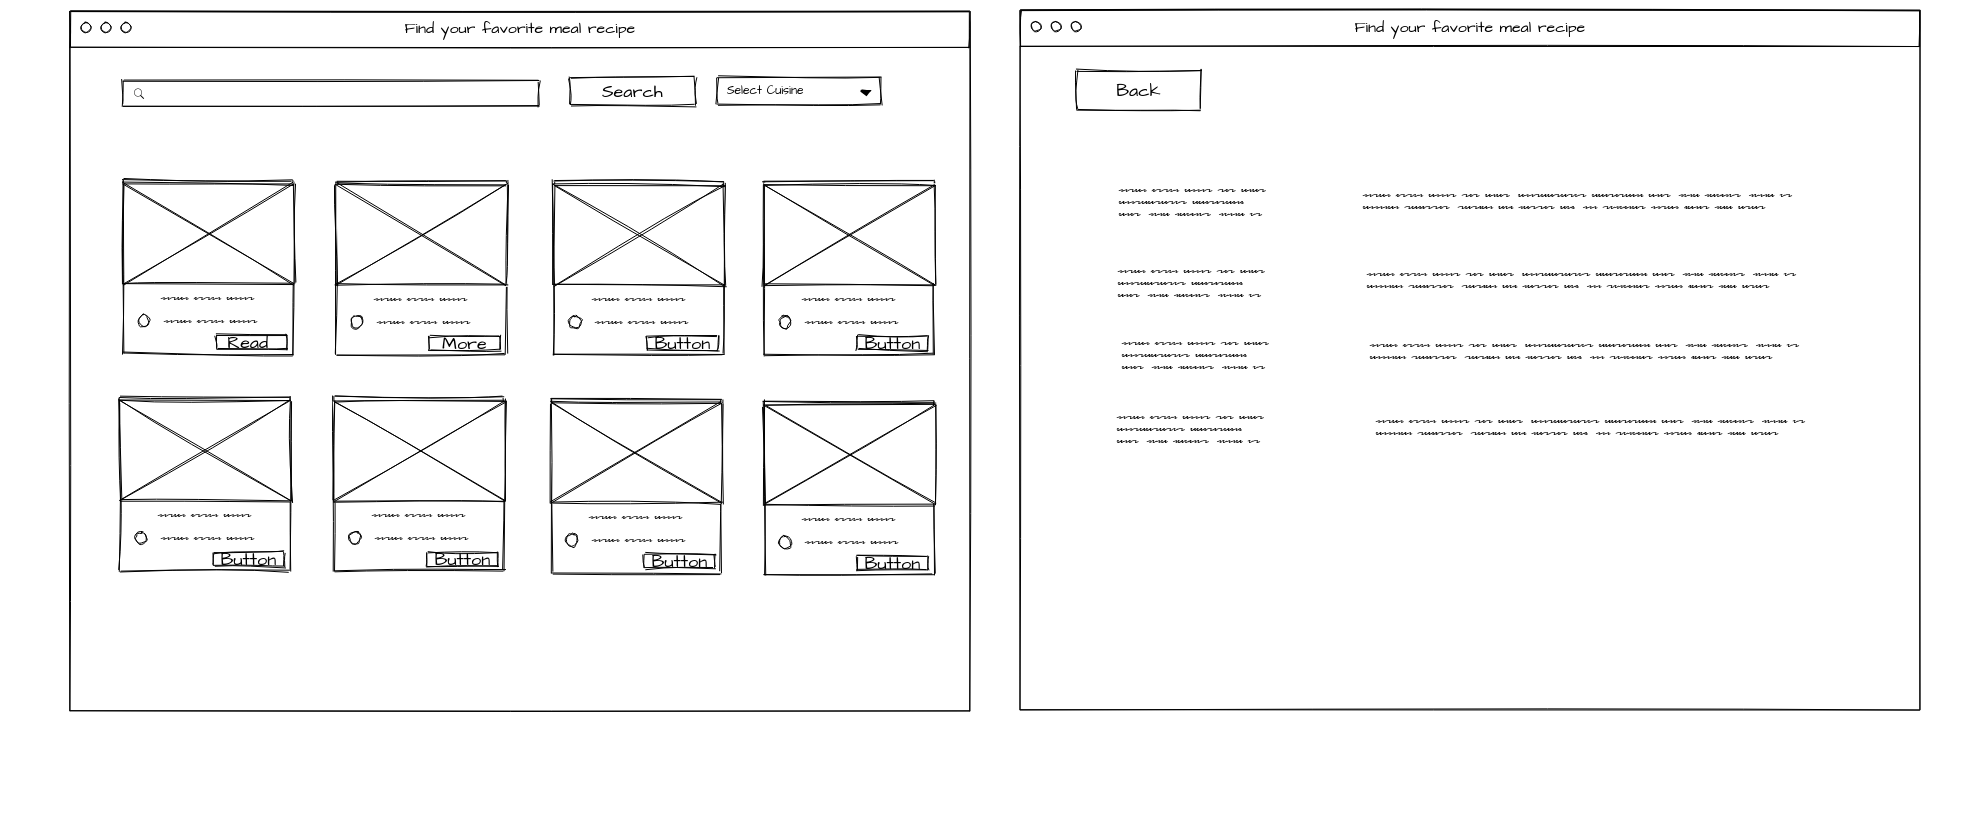
reactjs semantic ui wireframe
Functionalities
- User can search a Meal from the selected category
- User can change the meal category and it will show the meal based on the category
- User can click and read more information about a particular meal recipe.
Demo
Now, let’s see how to build an application like this in this tutorial using reactjs semantic ui.
Firstly, let’s split the wireframe into react components and implement them in our application.
On the left side screen, we have search and filter functionality. then, we have Meal cards which displays thumbnail and meal details.
the components would be Card,Input and Dropdown components.
Add the following code in App.js
import React, { useState, useEffect, Fragment } from "react";
import "./App.css";
import {
  Container,
  Input,
  Button,
  Dropdown,
  Loader,
  Dimmer,
  Card,
} from "semantic-ui-react";

import { useQuery } from "react-query";

function App() {
  const [currentCategory, setCurrentCategory] = useState(0);
  const [selectedMealId, setSelectedMealId] = useState(null);

  const {
    isLoading,
    error,
    data: categories,
  } = useQuery("categories", async () => {
    let result = await fetch(
      "https://www.themealdb.com/api/json/v1/1/categories.php"
    ).then((res) => res.json());
    result = result.categories.map((item) => {
      return {
        key: item.idCategory,
        text: item.strCategory,
        value: item.idCategory,
        image: item.strCategoryThumb,
      };
    });
    return result;
  });

  const { data: meals } = useQuery(
    ["meals", currentCategory, categories],
    async (key, currentCategory, data) => {
      let result = await fetch(
        `https://www.themealdb.com/api/json/v1/1/filter.php?c=${data[currentCategory].text}`
      ).then((res) => res.json());

      return result.meals;
    },
    {
      enabled: categories,
    }
  );

  if (isLoading)
    return (
      <Dimmer active inverted>
        <Loader inverted content="Loading" />
      </Dimmer>
    );
  return (
    <Container className="container" textAlign="center">
      // Container Logic comes Here
    </Container>
  );
}

export default App;
Here, we have the semantic ui Container which sets the responsive width for the component.
secondly, we fetch the meals and categories data from the mealdb API. we are using react-query to fetch the data from API.
When fetching the data, we need to show loader inside our component. To do that, we will be using Loader from semantic ui.
if (isLoading)
  return (
    <Dimmer active inverted>
      <Loader inverted content="Loading" />
    </Dimmer>
  );
Then, we use the meal data to render it in the Card Components. categories data to render it inside DropDown.
Let’s implement Search bar and Categories filter first.
<div className="row">
  <Input
    className="search-input"
    size="large"
    value={searchTerm}
    onChange={onSearchChange}
    placeholder="Search Meal"
  />
  <Button onClick={onSearch} secondary>
    Search
  </Button>
  <Dropdown
    className="drop-down"
    placeholder="Filter Category"
    fluid
    search
    selection
    value={categories[currentCategory].value}
    onChange={(e, { value }) => {
      setCurrentCategory(value[0] - 1);
    }}
    options={categories}
  />
</div>
react semantic ui input
Here, we use Input from semantic UI as a search input. we can add different props to change the behaviour of input.
focus- it adds the focus border around the input boxloading- it adds a loader inside of the input boxdisabled- it disables the option to edit our input.error- it shows the validation error inside of it.icon- it adds icon inside the input box.
There are all the major props inside the semantic UI Input Components.
react semantic ui button
After that, we add button for search functionality. Let’s see some of the important props in semantic ui to change the default button behaviour.
primary- changes the color of button to primary color.secondary- it changes the color of button to secondary color.active- it shows the button active state.disabled- it shows the button disabled state.loading- you can add loader inside the button which is a nice way to show the progress or API call fetch.
react semantic ui dropdown
Sematic UI adds lots of variation in the dropdown. few important one’s are Searchable Dropdown, Multi Selection, clearable selection.
search- it makes the default dropdown searchable.multiple- it makes the default dropdown a multiple selection one.clearable- it makes it clearable dropdown.
Now, we have implemented top part of our application. it’s time to implment the Card component and show the Meal inside of it.
create MealCard/index.js and add the following code to create semantic UI Card.
import React from "react";
import { Card, Image, Icon, Grid } from "semantic-ui-react";
const MealCard = ({ imageUrl, title, onClick }) => {
  return (
    <Card onClick={onClick}>
      <Image src={imageUrl} wrapped ui={false} />
      <Card.Content>
        <Card.Header>{title}</Card.Header>
      </Card.Content>
    </Card>
  );
};

export default MealCard;
Here, we add the Card from semantic UI which takes Content,Header and body.Also, we use only Content and Header from the semantic UI Card.
Once you implement this component. we can use it inside App.js.
{
  meals &&
    meals.map((meal) => {
      return (
        <MealCard
          title={meal.strMeal}
          onClick={() => {
            console.log("meal.idMeal", meal.idMeal);
            setSelectedMealId(meal.idMeal);
          }}
          imageUrl={meal.strMealThumb}
        />
      );
    });
}
we loop through meals from the API fetch data and render our MealCard inside it.
Now, that we have rendered our Meal inside the card. When user clicks the card, we need to show all the details about the Meal.
Let’s implement the functionalities inside a component MealDetails/index.js inside out components directory.
import React from "react";
import { useQuery } from "react-query";
import {
  Container,
  Input,
  Button,
  Dropdown,
  Loader,
  Dimmer,
  Header,
  Grid,
} from "semantic-ui-react";
const MealDetails = ({ mealId, onBackButtonClick }) => {
  const {
    isLoading,
    error,
    data: meals,
  } = useQuery(["categories", mealId], async (key, mealId) => {
    console.log("mealId", mealId);
    let result = await fetch(
      `https://www.themealdb.com/api/json/v1/1/lookup.php?i=${mealId}`
    ).then((res) => res.json());
    console.log("result", result);
    return result.meals;
  });

  if (isLoading)
    return (
      <Dimmer active inverted>
        <Loader inverted content="Loading" />
      </Dimmer>
    );

  if (meals) {
    console.log("meals", meals);
  }
  return (
    <Container>
      <Button secondary onClick={onBackButtonClick}>
        Back
      </Button>
      <h4>{meals[0].strMeal}</h4>

      <Grid divided="vertically">
        <Grid.Row columns={2}>
          <Grid.Column>
            <Header as="h3">Category:</Header>
          </Grid.Column>
          <Grid.Column>
            <p>{meals[0].strCategory}</p>
          </Grid.Column>
        </Grid.Row>
        <Grid.Row columns={2}>
          <Grid.Column>
            <Header as="h3">Instruction:</Header>
          </Grid.Column>
          <Grid.Column>
            <p>{meals[0].strInstructions}</p>
          </Grid.Column>
        </Grid.Row>
        <Grid.Row columns={2}>
          <Grid.Column>
            <Header as="h3">Source:</Header>
          </Grid.Column>
          <Grid.Column>
            <a href={meals[0].strSource}>Source</a>
          </Grid.Column>
        </Grid.Row>

        <Grid.Row columns={2}>
          <Grid.Column>
            <Header as="h3">Video:</Header>
          </Grid.Column>
          <Grid.Column>
            <a href={meals[0].strYoutube}>Video</a>
          </Grid.Column>
        </Grid.Row>
      </Grid>
    </Container>
  );
};

export default MealDetails;
Here, we take two props which are mealId and back button click function as props.
based on the mealId, we need to show the details. we use Semantic UI Grid to show the data. if you see the wireframe, we have property name in the left side and value in the right side.
For example, Instruction key in the left side and value for that will be in the right side.
you can use Grid to achieve any kind of alignment in the web application.
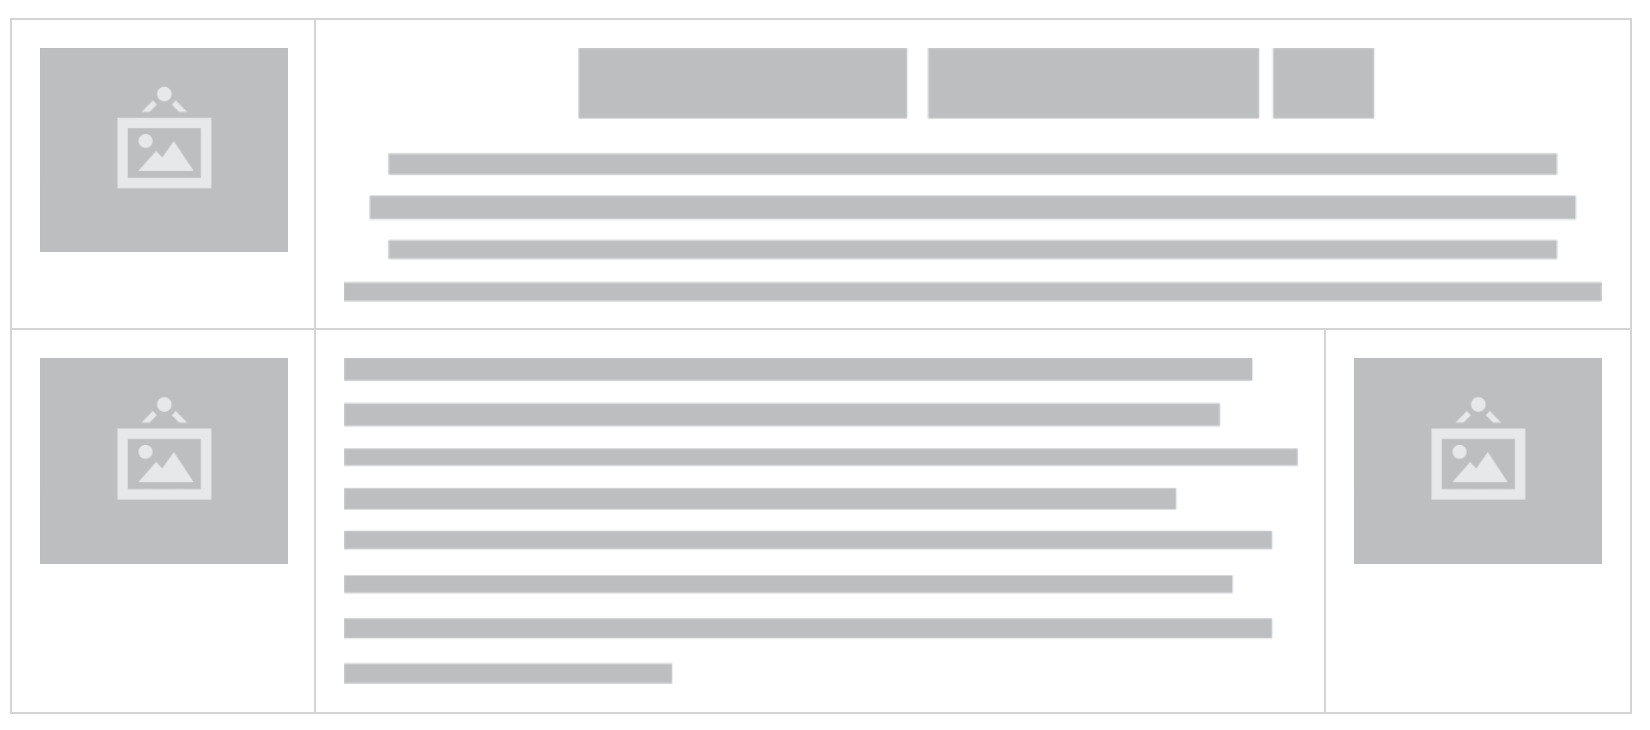
react semantic ui grid
Concept of react semantic ui grid is simple. There are rows and columns. you just need to specify the number of columns inside the Row and add the component inside the Grid.Column
For example,
<Grid.Row columns={2}>
  <Grid.Column>
    <Header as="h3">Category:</Header>
  </Grid.Column>
  <Grid.Column>
    <p>{meals[0].strCategory}</p>
  </Grid.Column>
</Grid.Row>
Here we specify two columns and add our component Header inside the Grid.Column.
react semantic ui header is straight forward. so, i leave it upto you to implement it.
Now, we need to add the component inside our App.js.There are two ways to implement this functionality.
- We can have a router, which routes to the meal details page based on the selected meal id. For example, it redirects to /meal/12 and we can get the id from there.
- we can store the selected meal id in the state and use it to conditional render the Meal details component inside
App.js.
In this application , we will be using second approach because, our application is small and simple. if you’re building a larger application. first approach is more appropriate.
our final App.js would look like,
import React, { useState, useEffect, Fragment } from "react";
import "./App.css";
import {
  Container,
  Input,
  Button,
  Dropdown,
  Loader,
  Dimmer,
  Card,
} from "semantic-ui-react";

import { useQuery } from "react-query";

import MealCard from "./components/MealCard";
import MealDetails from "./components/MealDetails";

function App() {
  const [currentCategory, setCurrentCategory] = useState(0);
  const [selectedMealId, setSelectedMealId] = useState(null);
  const [searchTerm, setSearchTerm] = useState("");
  const [isSearch, setSearch] = useState(false);

  const {
    isLoading,
    error,
    data: categories,
  } = useQuery("categories", async () => {
    let result = await fetch(
      "https://www.themealdb.com/api/json/v1/1/categories.php"
    ).then((res) => res.json());
    result = result.categories.map((item) => {
      return {
        key: item.idCategory,
        text: item.strCategory,
        value: item.idCategory,
        image: item.strCategoryThumb,
      };
    });
    return result;
  });

  const { data: meals } = useQuery(
    ["meals", currentCategory, categories],
    async (key, currentCategory, data) => {
      let result = await fetch(
        `https://www.themealdb.com/api/json/v1/1/filter.php?c=${data[currentCategory].text}`
      ).then((res) => res.json());

      return result.meals;
    },
    {
      enabled: categories,
    }
  );

  const { data: searchResults } = useQuery(
    ["searchMeals", isSearch, searchTerm],
    async (key, isSearch, searchTerm) => {
      if (isSearch) {
        let result = await fetch(
          `https://www.themealdb.com/api/json/v1/1/search.php?s=${searchTerm}`
        ).then((res) => res.json());
        console.log("result", result);
        return result.meals;
      } else {
        return [];
      }
    }
  );

  const onSearch = () => {
    setSearch(true);
  };

  const onSearchChange = (e) => {
    setSearchTerm(e.target.value);
  };

  if (isLoading)
    return (
      <Dimmer active inverted>
        <Loader inverted content="Loading" />
      </Dimmer>
    );
  return (
    <Container className="container" textAlign="center">
      {selectedMealId ? (
        <MealDetails
          mealId={selectedMealId}
          onBackButtonClick={() => setSelectedMealId(null)}
        />
      ) : (
        <Fragment>
          <div className="row">
            <Input
              className="search-input"
              size="large"
              value={searchTerm}
              onChange={onSearchChange}
              placeholder="Search Meal"
            />
            <Button onClick={onSearch} secondary>
              Search
            </Button>
            <Dropdown
              className="drop-down"
              placeholder="Filter Category"
              fluid
              search
              selection
              value={categories[currentCategory].value}
              onChange={(e, { value }) => {
                setCurrentCategory(value[0] - 1);
              }}
              options={categories}
            />
          </div>

          <Container className="container" textAlign="center">
            <Card.Group itemsPerRow={4}>
              {searchTerm && isSearch ? (
                searchResults &&
                searchResults.map((meal) => {
                  return (
                    <MealCard
                      title={meal.strMeal}
                      onClick={() => {
                        console.log("meal.idMeal", meal.idMeal);
                        setSelectedMealId(meal.idMeal);
                      }}
                      imageUrl={meal.strMealThumb}
                    />
                  );
                })
              ) : (
                <Fragment>
                  {meals &&
                    meals.map((meal) => {
                      return (
                        <MealCard
                          title={meal.strMeal}
                          onClick={() => {
                            console.log("meal.idMeal", meal.idMeal);
                            setSelectedMealId(meal.idMeal);
                          }}
                          imageUrl={meal.strMealThumb}
                        />
                      );
                    })}
                </Fragment>
              )}
            </Card.Group>
          </Container>
        </Fragment>
      )}
    </Container>
  );
}

export default App;
Checkout the Source code here