Building Bookmark Manager using nodejs and mysql
Building Bookmark Manager using nodejs and mysql
This article is an introductory tutorial for Nodejs and MySQL explaining how to build a bookmark manager using nodejs and mysql. Building Bookmark Manager using nodejs and mysql.
you may be thinking, Oh No!!!! Here comes an another To-do app tutorial. you maybe right. but, i wanted to teach the nodejs and mysql concept in a different way.
First of all nodejs and mysql makes a good pair to develop applications. Here, we are going to use knex which is a SQL Query builder for bookmark manager application.
Why Knex.js
Mainly, knex query builder provider a layer of abstraction from the running the native SQL Queries in Nodejs Application. One of benefit of it is, it provides an option to run dynamic fields and values in the Query.
Enough of talking, let’s see how to build an application using nodejs, knex and mysql.
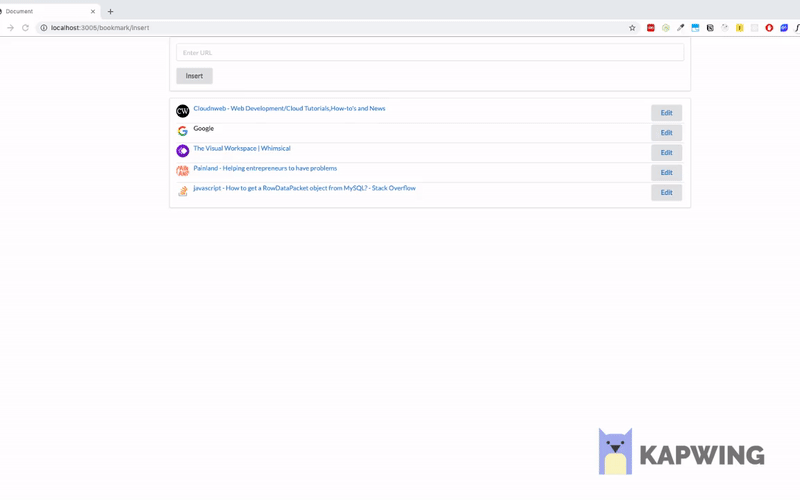
Demo
Setup
Complete Source code can be found in this repo. before going further, let’s see the dependencies for this application.
npm init --yes
npm install express body-parser express-handlebars knex mysql unfurl.js- Express - used to build a web application. it’s basically for framework to build apps.
- body-parser - if you want to parse the post request data in request body. body parser is a must have package.
- express-handlebars - this package is used to render the view in nodejs express.
- knex - SQL query builder used with mysql.
- mysql - this is used to connect with mysql that it running in the machine.
- unfurl.js - this library is used to unfurl the bookmarked url data.
we will be using babel for latest ES6 feature, if you are new to babel, checkout this article.
create a file app.js and add the following code,
import express from "express";
import bookmarkRoutes from "./routes/bookmarks";
import * as BodyParser from "body-parser";
const app = express();
import hbs from "express-handlebars";

app.use(BodyParser.json());
app.use(BodyParser.urlencoded({ extended: true }));

app.engine("hbs", hbs({ extname: "hbs" }));
app.set("view engine", "hbs");
app.use(express.urlencoded({ extended: true }));

require("dotenv").config({});

app.use("/bookmark", bookmarkRoutes);

app.get("/", (req, res) => {
  res.send("Hello Knex");
});

const PORT = process.env.PORT;
app.listen(PORT, () => {
  console.log(`app is listening on PORT 3005`);
});
Firstly, we import all the modules required for the application. After that, we are setting up the handlebar view engine.
app.engine("hbs", hbs({ extname: "hbs" }));
app.set("view engine", "hbs");
app.use(express.urlencoded({ extended: true }));
Secondly, we are setting up the environment variables which is done through dotenv.
require("dotenv").config({});After that, we define the routes file which are about to see in few minutes.
app.use("/bookmark", bookmarkRoutes);

app.get("/", (req, res) => {
  res.send("Hello Knex");
});
finally, we starts the http server by listening to a specified port.
const PORT = process.env.PORT;
app.listen(PORT, () => {
  console.log(`app is listening on PORT 3005`);
});
Now, it’s time to setup db and knexfile for DB. create a file knexfile.js and add the following code,
module.exports = {
  development: {
    client: "mysql",
    connection: {
      host: "localhost",
      user: "root",
      password: "password",
      database: "bookmark_app",
    },
  },
  staging: {
    client: "mysql",
    connection: {
      host: "127.0.0.1",
      user: "root",
      password: "123456",
      database: "bookmark_app",
    },
  },
};
By defining this, you can setup different stages for application db connection. it can contain development stage, production stage and testing stage.
After that, create a file db.js and add the following code,
require("dotenv").config({});
const environment = process.env.NODE_ENV;
console.log("environment", environment);
const config = require("./knexfile")[environment];

const connection = require("knex")(config);

module.exports = {
  getBookMarks: getBookMarks,
  getBookMarkById,
  updateBookmark: updateBookmark,
  insertBookMark: insertBookMark,
};

function getBookMarks(db = connection) {
  return db("bookmarks").select();
}

function getBookMarkById(id, db = connection) {
  return db("bookmarks").where({ id });
}

function insertBookMark(url, db = connection) {
  return db("bookmarks").insert({ url: url });
}

function updateBookmark({ id, url }, db = connection) {
  return db("bookmarks").where("id", id).update({ url: url });
}
Here, we have different function to run the db queries.
- getBookMarks - this function calls the db select and returns the total bookmarks in the database.
- getBookMarkById - this returns the bookmark data for the particular id.
- insertBookMark - As the name suggests, it inserts the data into the database.
- updateBookmark - this function updates the data for the specified id in the database.
We are done with the db model and knexfile configuration. now, it’s time to create migrations for mysql table.
what is migration ? and why ?
Mainly, migration is an efficient way to manage the changes or updates in the database which are basically adding or droping the tables.
it is easier to maintain the table in the database rather than changing it manually.
That is to say, create a folder migrations and file create_bookmark_table.js. add the following code,
exports.up = (knex) => {
  return knex.schema.createTable("bookmarks", (t) => {
    t.increments("id").primary().unsigned(), t.string("url");
  });
};

exports.down = (knex) => {
  return knex.schema.dropTable("bookmarks");
};
Now, it is time to run the migration using the command.
npx knex migrate:latest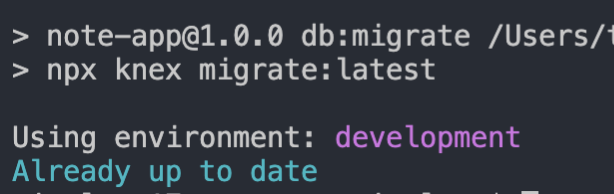
Further, create a folder routes and file bookmark.js to manage the routes
import { Router } from "express";
import { unfurl } from "unfurl.js";

const router = Router();
const db = require("../db");

const unfurlUrl = ({ id, url }) => {
  return new Promise(async (resolve, reject) => {
    try {
      const result = await unfurl(url);

      resolve({ id, data: result });
    } catch (e) {
      reject(e);
    }
  });
};

router.get("/", (req, res) => {
  db.getBookMarks()
    .then(async (bookmarks) => {
      console.log("bookmarks", bookmarks);
      const data = await Promise.all(
        bookmarks.map((bookmark) =>
          unfurlUrl({ id: bookmark.id, url: bookmark.url })
        )
      );

      res.render("index", { bookmarks: data });
    })
    .catch((err) => {
      res.status(500).send("DATABASE ERROR: " + err.message);
    });
});

router.post("/insert", (req, res) => {
  const url = req.body.url;
  console.log("url", url);
  db.insertBookMark(url)
    .then((bookmark) => {
      db.getBookMarks().then(async (bookmarks) => {
        const data = await Promise.all(
          bookmarks.map((bookmark) =>
            unfurlUrl({ id: bookmark.id, url: bookmark.url })
          )
        );
        res.render("index", { bookmarks: data });
      });
    })
    .catch((err) => {
      res.status(500).send("DATABASE ERROR" + err.message);
    });
});

router.get("/:id", (req, res) => {
  const id = req.params.id;
  db.getBookMarkById(id)
    .then((bookmark) => {
      console.log("bookmark", bookmark[0].url);
      res.render("update", { id: bookmark[0].id, url: bookmark[0].url });
    })
    .catch((err) => {
      res.status(500).send("DATABASE ERROR" + err.message);
    });
});

router.post("/:id", (req, res) => {
  const id = req.body.id;
  const url = req.body.url;
  db.updateBookmark({ id, url })
    .then(res.redirect("/bookmark"))
    .catch((err) => {
      res.status(500).send("DATABASE ERROR" + err.message);
    });
});

export default router;
Let’s breakdown it one by one,
- GET method - GET method returns all the bookmarks in the database. on returning the data, it will call a function which returns the unfurled data for an url.
- POST method - this takes the data and insert into the database and returns all the data that are available in the database.
- GET method(id) - this method returns the data for the specified id.
- POST method(update) - this method update the data for the specified id.
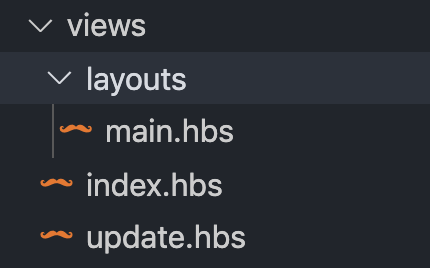
Finally, create a view to render the data in the express handlebars.
Summary
To sum up, we have seen how to build a simple bookmark manager application using nodejs and mysql. Take this application as a first step into learning nodejs and mysql and proceed further from here.
Complete Source Code